
Back Yard Pergola by Ralph Bagnall
/
Over the Memorial Day weekend in 2011, I built a pergola for our backyard patio. The patio is a large area of cement off the driveway, but gets direct sunlight all day long so it was largely unusable.

I had a number of 2x8s left over after tearing down a decorative bridge on my property, so we decided to use them as the basis for our pergola.
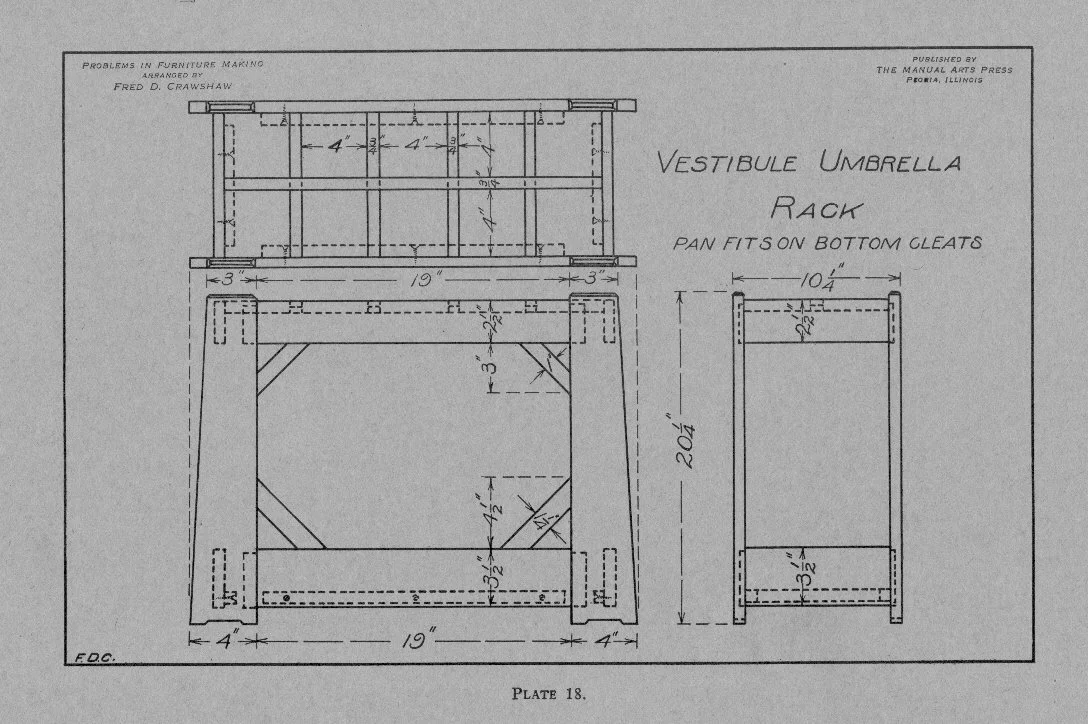
Step one was preparing the posts. I notched two faces of the 4x4s to provide a shoulder for the cross beams to sit on.
The notches are 1 inch deep and 7 inches long, the same as the cross beams (although they are called 2x8s, they actually measure 1-½” x 7”).
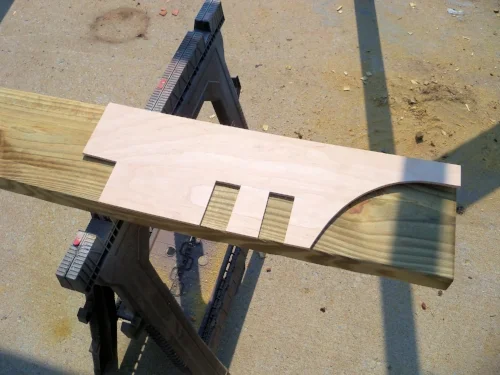
Now the cross beams needed to be prepped. I wanted a clean and even look to all the beams so I created a template to mark out the decorative end cuts as well as the notches for the upper beams. For the cross beams, I only cut the decorative cove at each end of the beam.
Two 12 foot cross beams were clamped onto each post and bolted together. This creates the three ‘arches’ that form the base of the pergola.

The ‘arches’ are connected by the 8 foot long upper beams. Four of these needed to be prepared before setting the uprights. The template was again used. Each upper beam got one end with the decorative cut and two notches to fit over the cross beams. The other end got a simple notch to overlap the center cross beams.
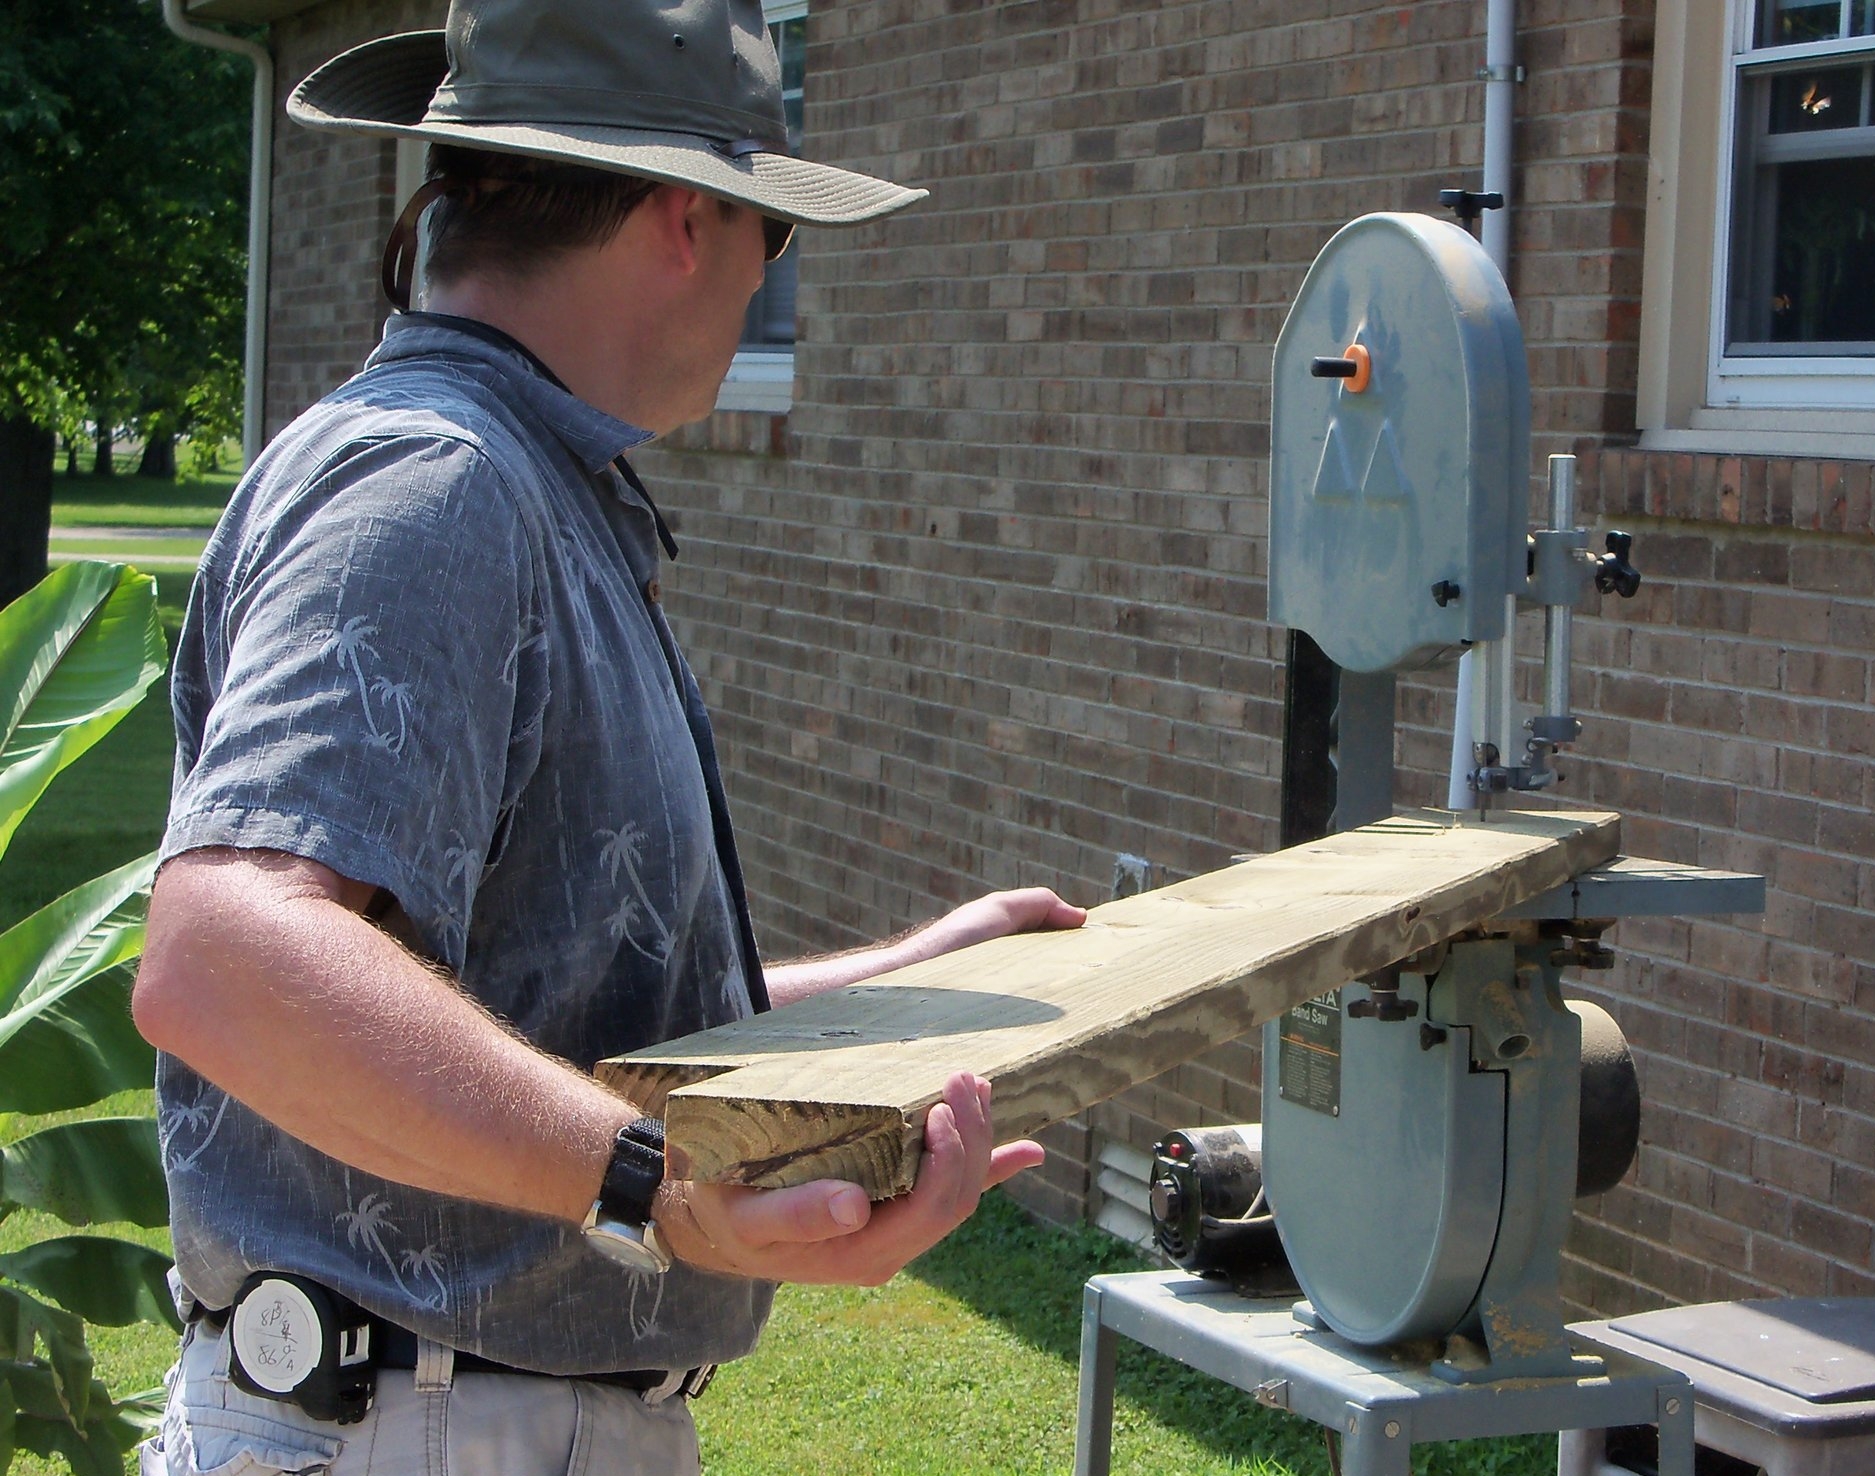
Although the decorative cove cuts can easily be made using a corded jigsaw, my jigsaw is cordless, so I used my bandsaw to cut the decorative coves. I then cut the notches with my circular saw, finishing up the cuts with a handsaw. Finally, 5/16” holes were drilled through the upper beams at all three notches for bolting them down.
Upper beams were set into each corner to tie all the uprights together, and 6” lag bolts were used to secure the upper beams to the cross beams. The structure was now self-supporting, but braces are needed to stiffen the legs.

I cut eight braces to stiffen the structure. One on each side of the center legs, and one on each corner leg.
Angle braces were also added running from the corner posts up between the cross beams and bolted into place. Now the structure was stiff enough to continue working on.
I had laid out the spacing so that the upper beams were about 12” on center, and continued cutting and bolting them in place.
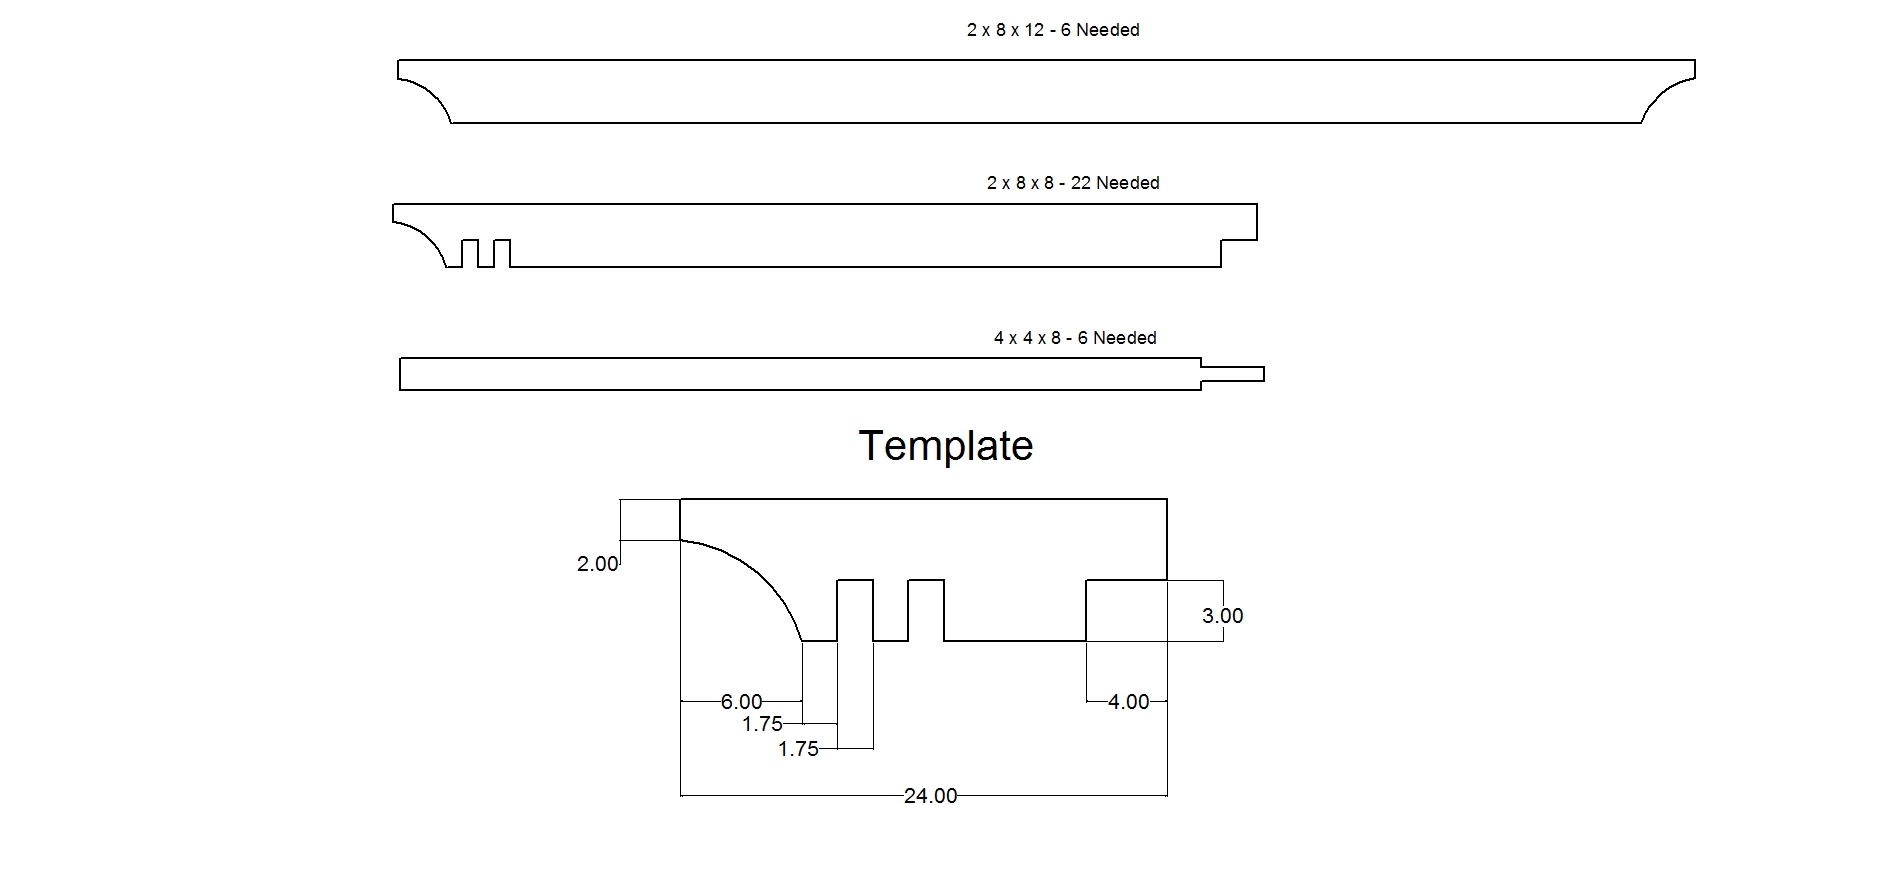
Pergola Parts (Download PDF)

Flat boards were added on top of the cross beams on each side to mount the shades to. We purchased exterior roll-up shades from Home Depot and hung them across each opening. The pergola is oriented roughly North to South (as the upper beams run) so the sun comes in through the ‘sides’ in the morning and afternoon.
After finishing the pergola, I realized that the upper beams, at 12 inches on center, really don't provide enough shade with the summer sun overhead. I decided to add pressure treated lattice to the top of the pergola to provide more shade. I used what Lowe's calls ‘Privacy Screen’ as the gaps between the lattice are smaller. This has proved to be very shady and cool, even at noon with the temperatures above 100 degrees.